Example 2
In this example, we will run a glue job to transform a time series dataset into a format which is required for successfully importing into AWS Forecast for training a model.
All source code can be found in this repository and the scripts for the various examples are stored in the respective named folders.
Upload data and script to S3
The dataset used in this example is the sample-manning.csv in the datasets folder. This data contains three columns:
‘index’, ‘ds’, ‘y’. We need to upload this to S3 running the prepare_data_for_s3.py script.
The script also creates an additional itemid column and sets to arbitary value (1). This is done to conform to the requirements of
AWS Forecast API which will be used later to train a model and generate forecasts for a desired horizon. It expects there to be
an item id field which is a forecast dimension in the time series dataset. This is more relevant in some examples like retail where for example you
may want to forecast the demand for shoes and socks based on a store’s previous sales and hence require more granular detail with the extra forecast
dimensions. In such a case you may have socks and shoes as different item ids, and stores locations as another forecast dimension along with the target field ‘sales, since socks maybe sold in two store
locations whilst shoes are sold in only one.
In this example, all the items belong to the same group (i.e Manning’s wikipedia hits) and hence take the same value in the itemid column.
The dataset uploaded will have the following s3 path s3://aws-forecast-demo-examples/sample_manning.csv which is the default bucket
and object key setting as expected by cloudformation template glue-example2.yaml, although this can be overriden by setting a different value for the
bucket and Key parameters.
The glue script raw_csv_to_input_aws_forecast.py would also need to be uplaoded to S3.
If glue jobs have been run previously, there should be a bucket in S3 of the format - aws-glue-assets-${AWS::AccountId}-${AWS::Region}
Inside this bucket there will be a scripts folder where glue references all the scripts generated if glue job etl workflow is
created from the console.
Upload the glue script into the bucket in the scripts folder via console or cli.
If this bucket does not exist, then create your own. However, the ScriptLocation property of the GlueJob resource in the
cloudformation template used to create the scripts will need to be modified accordingly, so the glue job created can reference
the script in the correct location.
Creating resources and running etl pipeline
We can create the necessary resources for the glue etl pipeline via cloudformation template in cloudformation/glue/glue-example2.yaml either via the cloudformation console or cli https://docs.aws.amazon.com/cli/latest/reference/cloudformation/create-stack.html This will create a custom classifier, glue job and crawler.
The glue script raw_csv_to_input_aws_forecast.py contains a number of glue and pyspark transformations to
filter the existing dataset to only include historical data for one year (2015) and then reformat the dataset
to have columns (“timestamp”, “target_value”,”item_id”) and values.
The outputs of the different transforms can be seen in the notebook example2.ipynb in the notebooks folder.
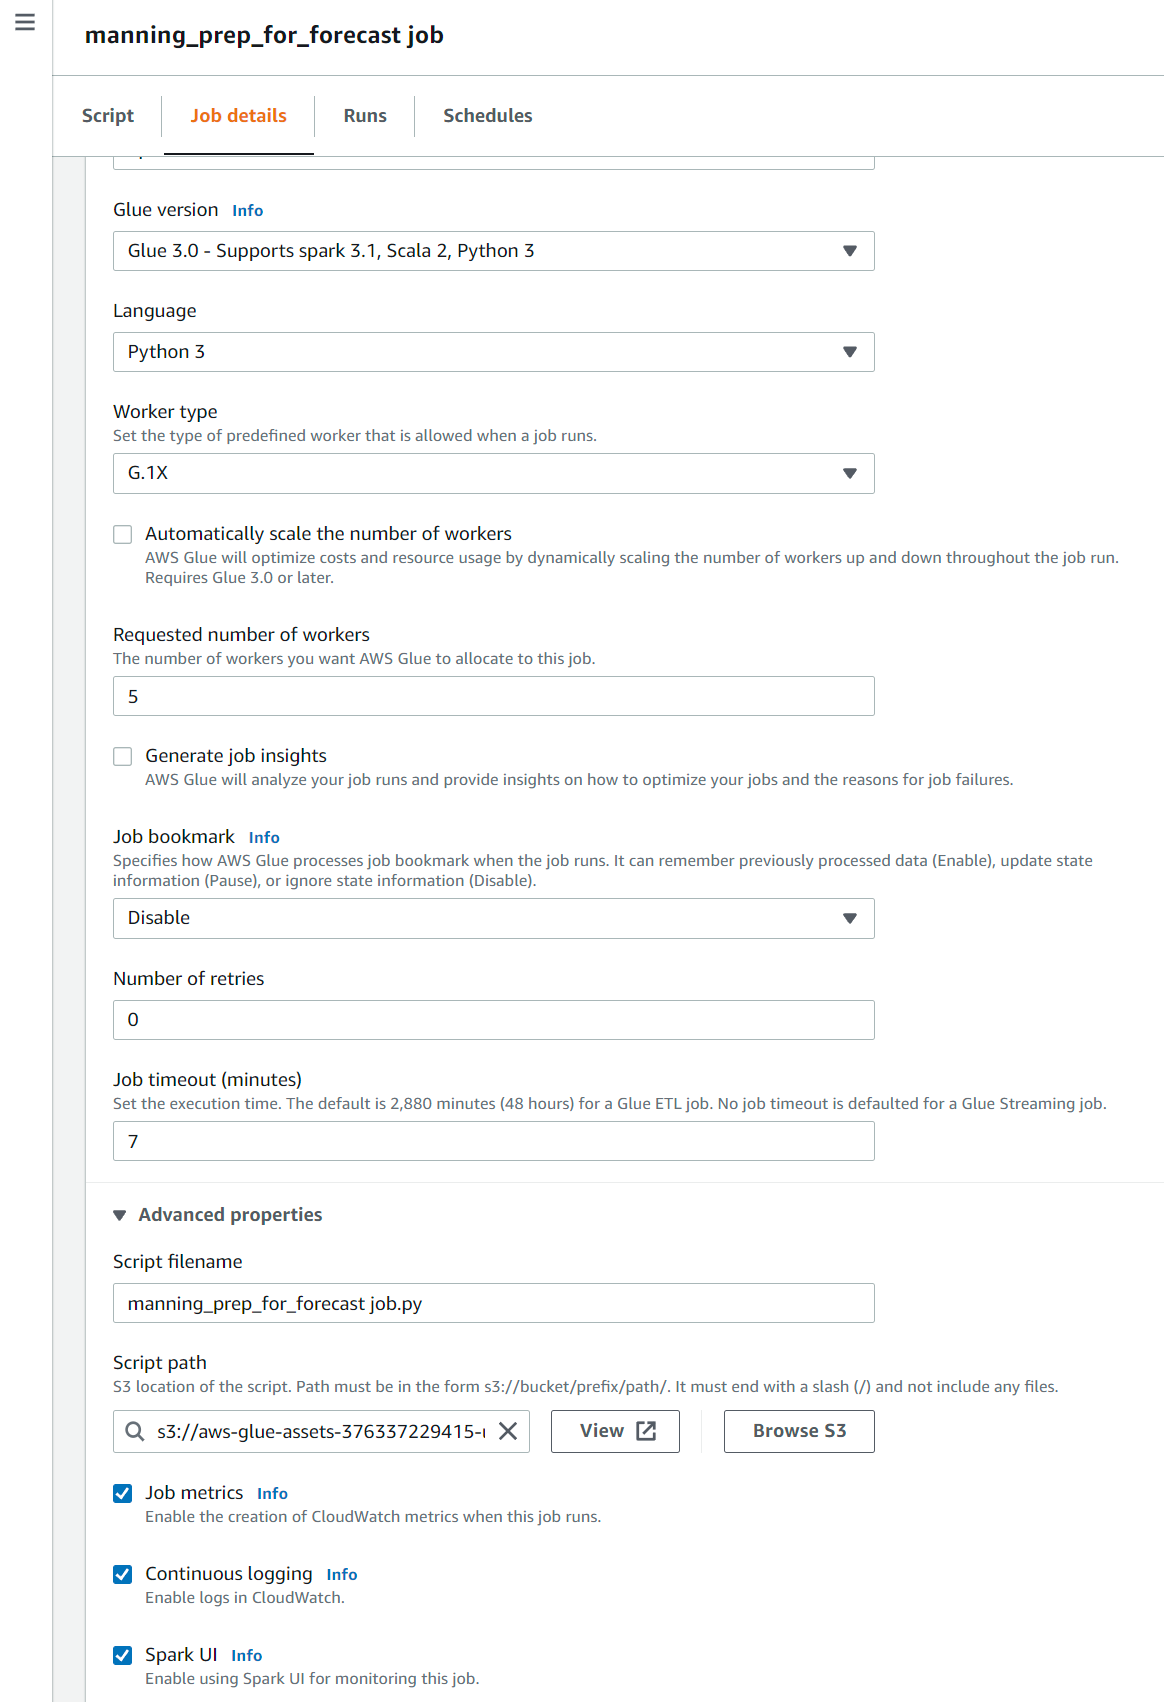
The glue job configuration can be checked on the console as shown in screenshot below. We have configured a max of 5 nodes including the driver node and set the job to timeout automatically after 7 mins. The script path as set in the cloudformation is shown in the script path folder. We can also check the logs for the spark jobs in cloudwatch in realtime by enabling continuous logging in the glue config
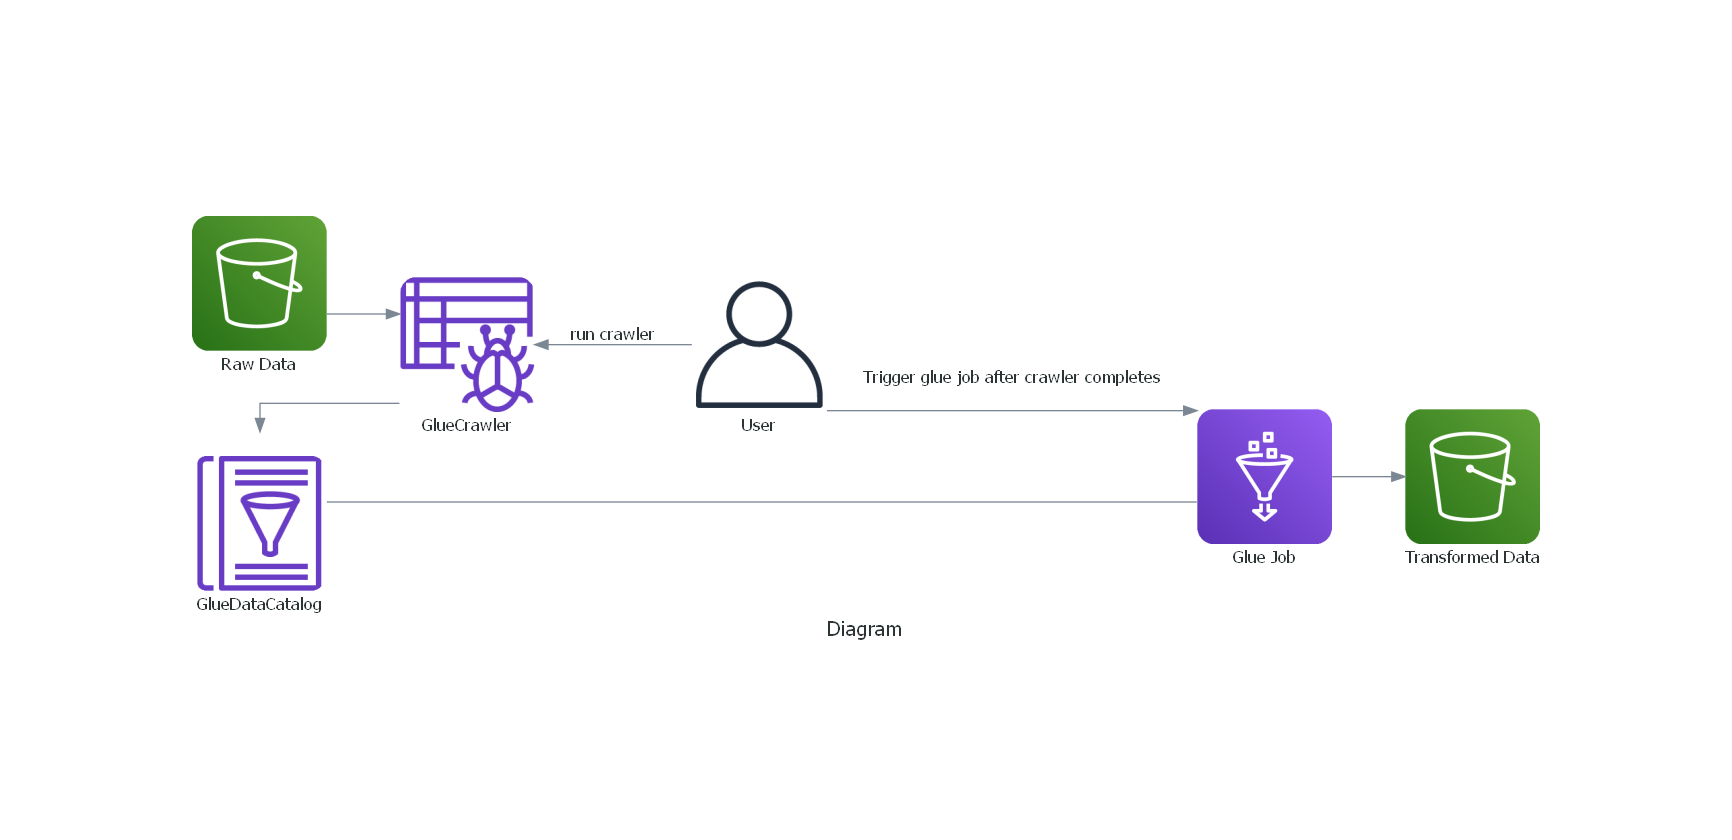
The intended workflow is as depicted in the diagram below. The user triggers the glue crawler which populates the data catalog after crawling csv file from S3, using the custom classifier for header names and delimiter. The glue job can then be manually triggered by the user, which would fetch the data from the catalog and run a number of transforms and finally write the data back to S3.
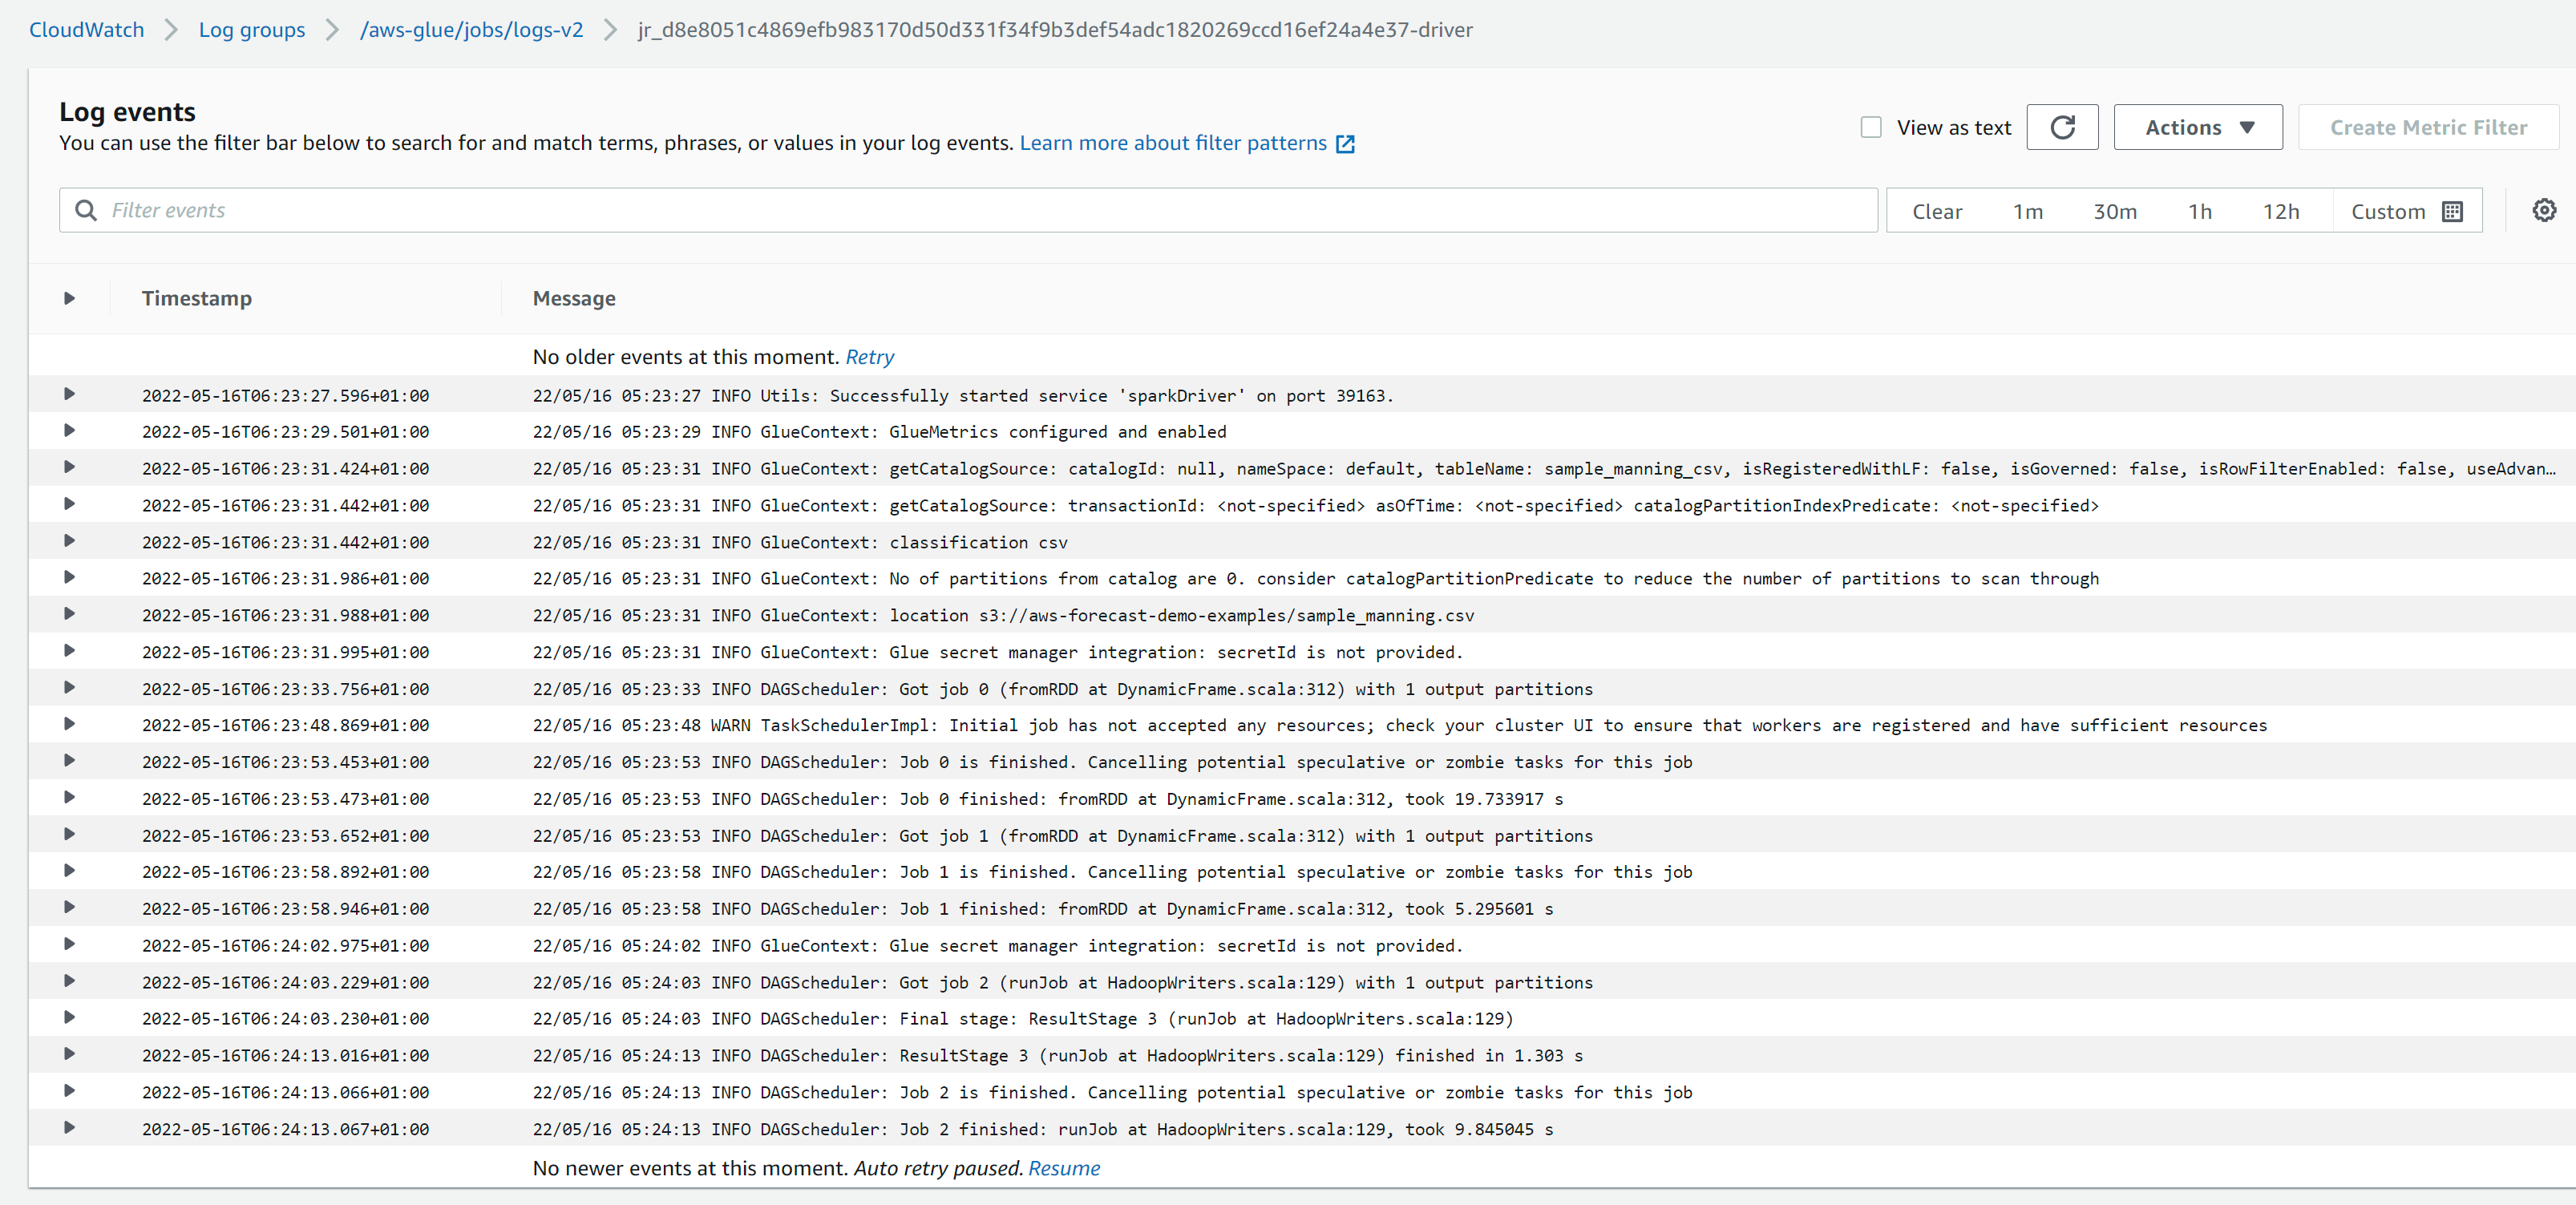
Checking the glue logs, we can see a separate log stream for each worker node, including the driver.

In the driver logs we can see the logs associated with initialisation of the GlueContext and the DAG scheduler which translates the job (submitted to it by the Context after an action is performed on the RDD) into a set of stages that are submitted for execution. It communicates with the task scheduler which tracks the availability of resources (executors) for running these stages.
In the executor logs, we can see the logs associated with the application script.
